by
[user not found]
| Sep 25, 2015
Potholes are a massive problem in the world. In the United Kingdom, a car is injured by a pothole every 11 minutes and in India potholes can become so massive they can ruin entire cars, buses and hurt pedestrians. Here in the United States as of 2014 pothole repair costs exceed 6.4 billion dollars annually.
In other words, potholes are a massive problem both for the towns that need to fix them and the drivers and motorists that have to endure them.
VIBCO has been very active in pothole repair in recent years and restoring America's roads. In our home state of Rhode Island, a state whose roads rank 49th out of 50th in terms of road quality, we began the Pothole Free RI and Pothole Free USA initiatives aimed at fixing Rhode Island's pothole problems. The initiative donated to fourteen GR-1600H Pothole Patchers™ to fourteen Rhode Island cities and provided additional training in proper pothole repair and how to fix a pothole.
Getting the world's roads fixed - and keeping them fixed - is something we really care about and are very invested in. Check out the infographic below detailing how to properly fill a pothole:

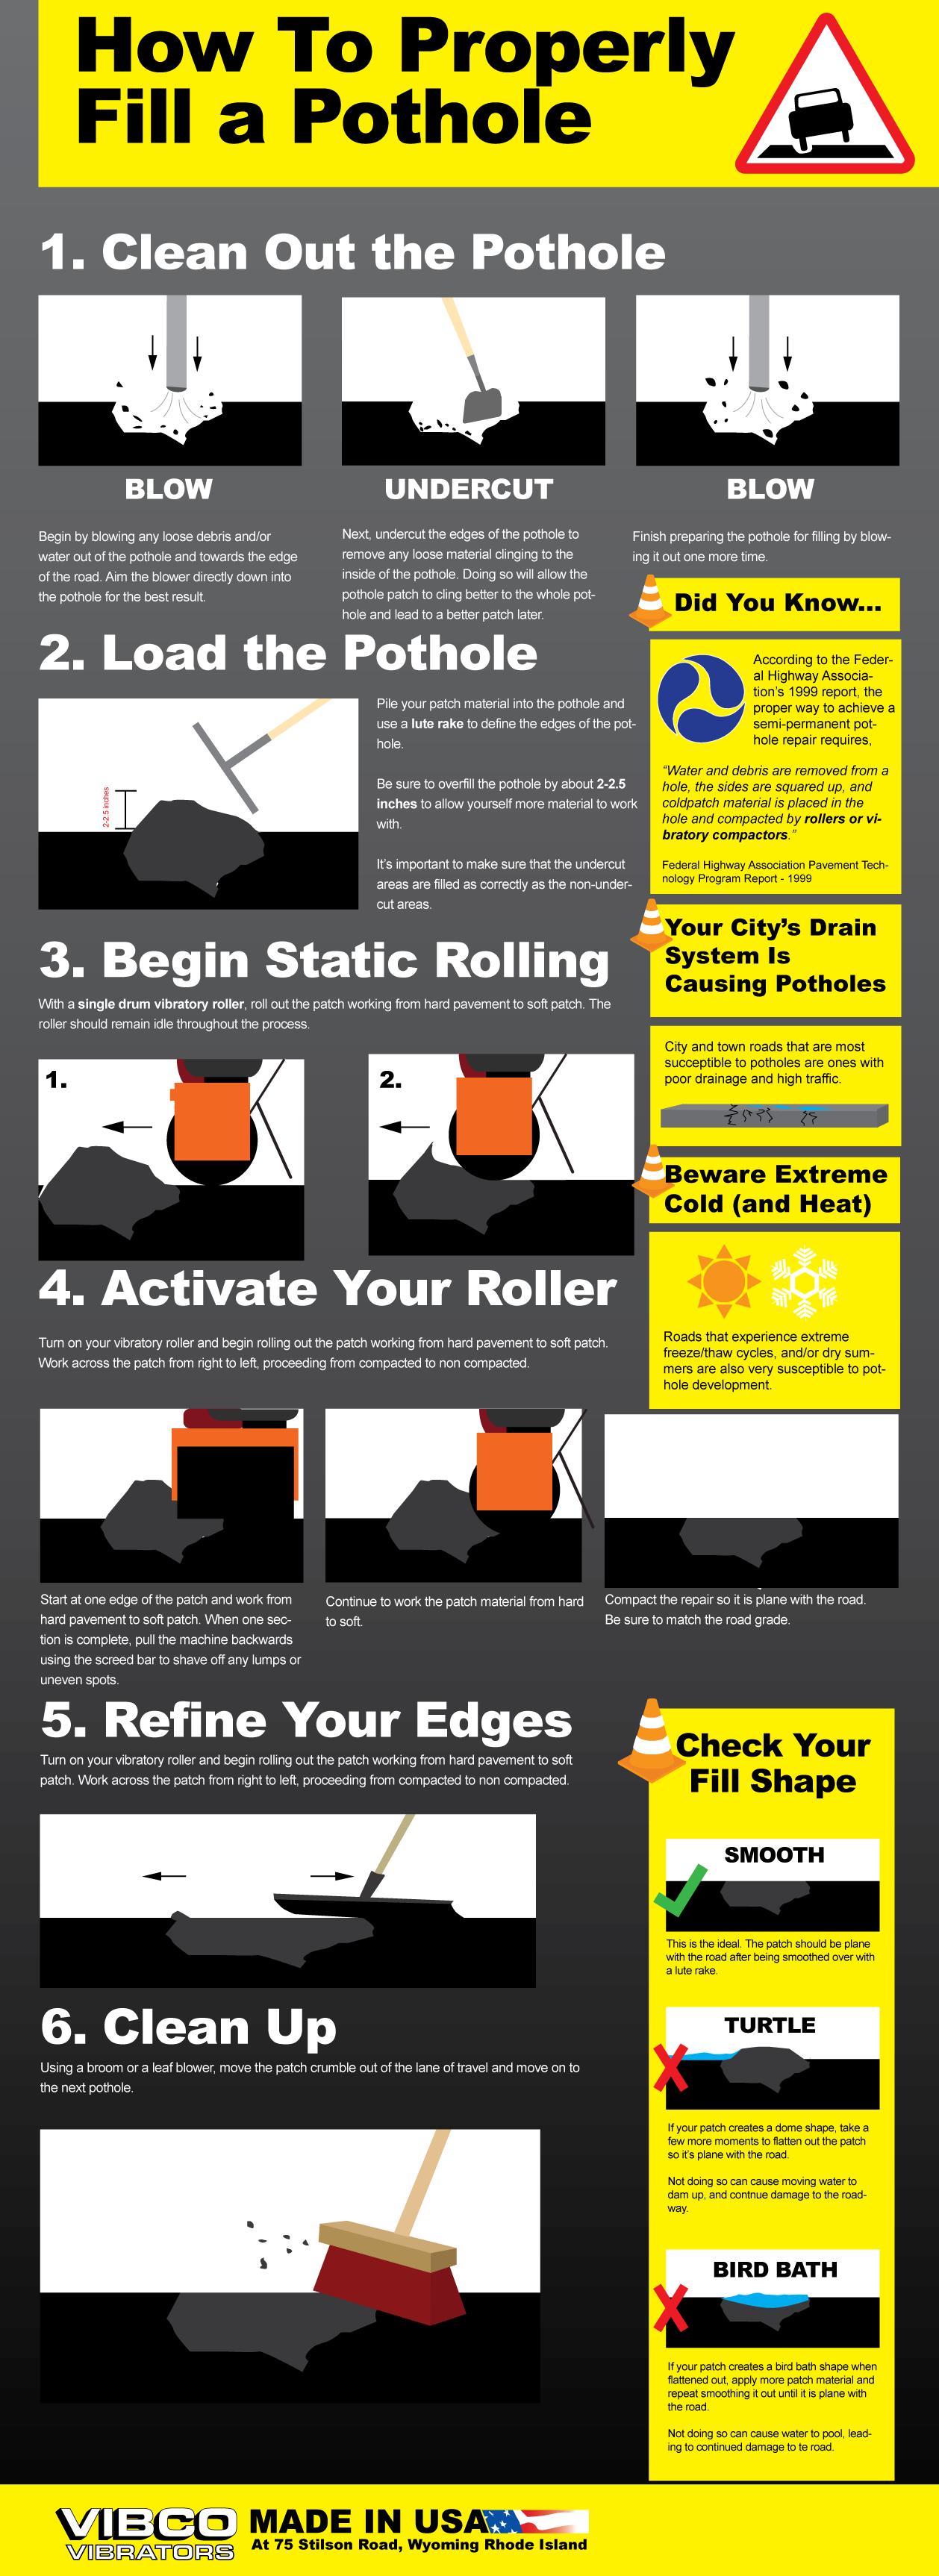
How to Properly Fill a Pothole
1. Clean Out the Pothole

Begin by blowing any loose debris and/or water out of the pothole and towards the edge of the road. Aim the blower directly down into the pothole for the best result.
Next, undercut the edges of the pothole to remove any loose material clinging to the inside of the pothole. Doing so will allow the pothole patch to cling better to the whole pothole and lead to a better patch later.
Finish preparing the pothole for filling by blowing it out one more time.
2. Load the Pothole

Pile your patch material into the pothole and use a lute rake to define the edges of the pothole.
Be sure to overfill the pothole by about 2-2.5 inches to allow yourself more material to work with.
It’s important to make sure that the undercut areas are filled as correctly as the non-undercut areas.
3. Begin Static Rolling

With a single drum vibratory roller, roll out the patch working from hard pavement to soft patch. The roller should remain idle throughout the process.
4. Activate Your Roller

Turn on your vibratory roller and begin rolling out the patch working from hard pavement to soft patch. Work across the patch from right to left, proceeding from compacted to non compacted.
Start at one edge of the patch and work from hard pavement to soft patch. When one section is complete, pull the machine backwards using the screed bar to shave off any lumps or uneven spots. Continue to work the patch material from hard to soft. Compact the repair so it is plane with the road. Be sure to match the road grade.
5. Refine Your Edge

Turn on your vibratory roller and begin rolling out the patch working from hard pavement to soft patch. Work across the patch from right to left, proceeding from compacted to non compacted.
6. Clean Up

Using a broom or a leaf blower, move the patch crumble out of the lane of travel and move on to the next pothole.